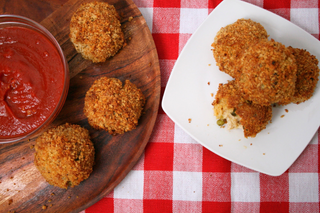
Air Fryer Arancini Recipe
This arancini recipe made of risotto balls are a perfect blend of creamy, savory goodness on the inside and golden, crunchy perfection on the outside. Made with Panacheeza, plant based parmesan substitute, brings all the flavor without the dairy!
Best of all, they're air-fried, making them a healthier, guilt-free indulgence that you’ll want to serve at every gathering. For the ultimate result, use our parmesan risotto recipe as the base to take these bites to the next level. Enjoy these bite-sized delights hot and fresh—perfect as a snack, appetizer, or party treat!

Makes 8 Arancini balls
Ingredients
2 cups Risotto leftover and chilled
2 eggs (plant based or regular)
¼ cup All-Purpose Flour
1 cup Panko Breadcrumbs
2 tablespoons Olive Oil
2 tablespoons Panacheeza
8- 1 inch cubes dairy-free Mozzarella
½ cup Frozen Peas thawed (or microwaved)
Salt to taste
Pepper to taste
Directions
-
Preheat your Air Fryer to 360°F.
-
Start with 3 bowls- In bowl one, add your flour. In bowl 2, add your two eggs and whisk them until combined. In your third bowl, add your Panko breadcrumbs, Panacheeza, Salt Pepper and Olive Oil.
-
Mix thawed peas into leftover risotto.
-
Divide your risotto into 8 equal balls (about ¼ cup per Arancini). Take a 1-inch cube of mozzarella and stick it in the middle of the risotto ball and then roll them like a meatball until they are round and even. Repeat with all the risotto balls until you have 8 equal spheres.
-
Working one at a time, dip each risotto ball into the flour, then into the egg wash and then into the breadcrumb mixture - ensuring there are no gaps in the breadcrumb coating.
-
Drizzle the basket of your Air Fryer with a bit of Olive Oil. Place your Arancini balls into your Air Fryer and cook at 360° for 25 min or until crispy and golden brown.
-
Serve immediately with a marinara sauce and enjoy!


Robin Schetzen
Hi.. may I also get your corn dip recipe..
thank you
Hi.. may I also get your corn dip recipe..
thank you